How to MCP: The Complete Guide to Understanding Model Context Protocol and Building Remote Servers

Updated May 2026
Refreshed for the current MCP SDK. Code examples now use the simpler per-session McpServer pattern with StreamableHTTPServerTransport.
Introduction
The Model Context Protocol (MCP) promises an improved and standardized way of connecting LLM applications like Claude and ChatGPT with external tools and services via their APIs. It's a great effort, but if you've ever tried implementing an MCP server you'll quickly find yourself lost amid changing specifications, a lack of real-world examples, and terse documentation.
"The worst documented technology I have ever encountered," as one Hacker News commenter described it.
After spending a week combing through specs, SDK code, and GitHub issues, to build our own remote MCP server, this guide distills everything we've learned about MCP into a practical resource to help you:
- Understand MCP fundamentals and how data flows
- Build a spec-compliant remote MCP server that's ready for clients like Claude
- Implement authentication correctly using OAuth 2.1 from the get-go
- Avoid common pitfalls that can cost you hours of debugging
Whether you're building an MCP server to connect your app to LLMs, or a personal one to add AI to your workflows, you'll find the exact steps required to create a working implementation that balances simplicity with full protocol compliance.
Table of contents
Why MCP is frustrating today
The MCP spec is still a work in progress, meaning finding consistent up-to-date code examples and documentation isn't so easy. Here's a quick rundown of common frustrations:
- Multiple protocol versions: MCP supports two transport standards with different requirements:
- HTTP+SSE (2024-11-05) - The legacy protocol
- Streamable HTTP (2025-03-26) - The modern protocol
- Different communication patterns: Each transport uses distinct methods:
- HTTP+SSE requires maintaining two separate endpoints (
GET /mcpfor SSE andPOST /messagesfor requests) - Streamable HTTP uses a single endpoint (
POST /mcp) but involves complex request/response patterns
- HTTP+SSE requires maintaining two separate endpoints (
- Local and Remote servers: "server" can refer to either the local or remote implementation of the protocol which can cause confusion about which setup is being discussed
- Sparse Documentation: The official MCP website recommends vibe-coding your way to an MCP server, at the cost of practical examples
- Unclear errors and evolving specs: Vague error messages ("Claude was unable to connect") and frequent spec changes add friction to implementation
It’s a new protocol, so much of that can be forgiven, but it’s a big source of confusion. The sections below will provide clarity on all of the above and walk you through building a complete solution.
In the rest of this guide, we'll focus on:
- Explaining MCP: What it is, how it works and why it helps
- Building for compatibility: Create a server that handles both modern and legacy protocols
- OAuth implementation: Set up proper authentication with Firebase and MCP's required endpoints
- State management: Handle session state across different transport types
- Production deployment: Deploy your server to cloud platforms with proper monitoring
- Troubleshooting: Diagnose and fix the most common integration issues
Let's jump in!
Part 1: Understanding MCP Fundamentals
What MCP Actually Is (In Plain Language)
The Model Context Protocol is a standardized way for LLM applications (such as Claude, ChatGPT, and Cursor) to communicate with external APIs and services. It's a bridge between text-based AI models and your code-based API endpoints.
LLMs can't directly run code - but they can be taught to call functions that do. With MCP, you define each of your API capabilities as a "tool" that allow LLMs to:
- Discover what tools (your API capabilities) are available
- Learn how to use those tools (parameters, formats, etc.)
- Choose the most appropriate tool based on the user's prompt
- Call those tools to execute your underlying API code
- Receive structured responses they can understand
Think of MCP as "OpenAPI for LLMs" - a standard interface that makes it easier for AI models to interact with your services.
How Tools in MCP Connect LLMs to Your Existing API Endpoints
How exactly does an LLM application like Claude know which API endpoint to call and what parameters to send when, for example, a user asks "Show me all my Twitter scrape recipes"?
In our case, Simplescraper has a REST API endpoint /recipes that accepts parameters like host and sort and returns a list of recipe. But LLM applications have no idea this endpoint exists or what parameters it accepts, unless we tell them about it.
To solve this, MCP allows us to create a tool definition that:
- Names the tool in a way that describes its purpose
- Provides a description of what the tool does
- Defines what parameters it accepts
- Connects the tool to the actual API endpoint it represents via a handler function
Now when a user asks the Simplescraper MCP about their Twitter recipes, Claude can look at all available tools, understand their purposes through these descriptions, and select the appropriate one to handle the request.
Tool Definition Structure
A tool definition consists of these key elements:
| Element | Purpose | Example |
|---|---|---|
| Name | Unique identifier the LLM uses to select the tool | "list_recipes" |
| Parameter Schema | Defines what arguments the tool accepts | { host: z.string() } |
| Description | Helps the LLM understand when to use this tool | "Returns a list of user's scrape recipes with optional filters and sorting." |
| Handler Function | The code that calls your API, with access to authentication info (authInfo) | async (params, { authInfo }) => { const response = await fetch(${API_BASE_URL}/recipes?host=${params.host}, { headers: { 'Authorization': Bearer ${authInfo.token} }}); return await response.json(); } |
The Flow of a Prompt Using Tools
When a user asks a question, several steps happen behind the scenes to connect their natural language request to your API:
First, the LLM application analyzes the user's request to determine intent. Then it selects the appropriate tool from those you've defined. In this example, when it detects a request about Twitter recipes, it chooses the list_recipes tool and automatically adds the parameter host: "twitter.com". Your MCP server then executes the actual API call, receives the data, and returns it in a format the LLM application can present to the user.
Example Tool Definition
Here's how you would define a tool in your MCP server:
// defining a tool
server.tool(
  "list_recipes",  // Name that LLM application will use
  {
    // parameters schema (what LLM can pass)
    host: z.string().optional().describe("Filter by website host")
  },
  {
    // metadata (helps LLM decide when to use this tool)
    description: "Returns a list of your scrape recipes with filters"
  },
  // actual function that calls your API
  async (params, { authInfo }) => {
    try {
      // get user's API key
      const apiKey = await getApiKeyFromToken(authInfo.token);

      // make the actual API call
      const result = await fetchRecipes(apiKey, params);

      // return formatted response to LLM
      return {
        content: [{ type: "text", text: JSON.stringify(result) }]
      };
    } catch (error) {
      return handleError(error);
    }
  }
);
The LLM application never directly executes code or calls your API. It simply identifies the right tool and parameters, then your MCP server handles the actual API communication and returns formatted results.
Tool Authorization and User-Specific Access
An important feature of MCP tool handlers is that they receive an authInfo object containing authentication details about the requesting user.
The AuthInfo object includes:
token: The OAuth access tokenclientId: Identifier for the OAuth client application (provided by the client - e.g., "claudeai")scopes: Array of permission scopes granted to the userexpiresAt: Optional expiration timestamp
Which allows you to implement per-user authorization for your tools:
// toolhandler receives both params and authInfo
async (params, { authInfo }) => {
  try {
    // authInfo contains token, clientId, and scopes
    console.log("tool called with authInfo:", authInfo);

    // you can use the token to get user-specific credentials
    let apiKey;
    if (authInfo?.token) {
      // look up the user's API key from their MCP token
      apiKey = await getApiKeyFromToken(authInfo.token);
    }

    // you can also check scopes to implement fine-grained access control
    if (!authInfo?.scopes || !authInfo.scopes.includes("list_recipes")) {
      return {
        content: [
          {
            type: "text",
            text: "Unauthorized: User lacks permission to list recipes",
          }
        ]
      };
    }

    // make API call with user's credentials
    const result = await fetchRecipes(apiKey, params);
    return { content: [{ type: "text", text: JSON.stringify(result) }] };
  } catch (error) {
    return handleError(error);
  }
}
This enables you to implement powerful authorization patterns:
- User-specific API keys: Map MCP tokens to user-specific API keys in your database
- Scope-based access control: Restrict tool access based on assigned scopes
- Resource-level permissions: Check if a user has access to specific resources
- Usage quotas and rate limiting: Implement per-user limits on tool usage
Key Components of an MCP Server
An MCP server consists of several essential components:
- Tools: Functions that AI models can call, each with defined parameters and return values
- Transport Layer: The communication mechanism between the AI model and your server
- Session Management: How your server tracks conversation state across multiple interactions
- Authentication: How you verify and authorize access to your tools
The MCP protocol also defines a structured format for messages, based on JSON-RPC 2.0, which handles things like request/response correlation, error reporting, and tool invocation.
MCP Capabilities Table
While tool calling is the core feature that most MCP servers implement, the protocol supports additional capabilities that can enhance functionality and user experience based on your goals.
| Capability | Description | Status |
|---|---|---|
| Tool Calling | Allow models to invoke your functions with parameters | Core Feature |
| Streaming | Send incremental partial results back to clients | Optional |
| Authentication | Secure access with OAuth 2.1 with PKCE | Required for Production |
| Session Management | Track conversation state across multiple interactions | Core Feature |
| Sampling | Enable models to run prompts through your server | Optional |
| Dynamic Tool Discovery | Let models discover available tools at runtime | Optional |
| Error Handling | Return structured JSON-RPC errors | Core Feature |
| Event Notifications | Send server-initiated messages to clients | Optional |
Local vs. Remote Servers: Understanding the Options
MCP servers can be implemented in several ways, from local implementations to fully remote services. The MCP ecosystem is still evolving, with local servers currently being the most common due to their ease of implementation, but remote servers likely represent the future direction as the ecosystem matures. Each approach offers different features and use cases.
Local MCP Servers:
Currently, many MCP implementations involve users downloading server code from GitHub repositories and running it locally.
How it works:
- User downloads MCP server code from GitHub
- The AI application launches this server as a subprocess on the user's computer
- Communication happens via STDIO (Standard Input/Output)
- Configured through a local file like
claude_desktop_config.json
// claude_desktop_config.json for a local server
{
  "mcpServers": {
    "simplescraper-local": {
      "command": "node",
      "args": [
        "C:/Users/Me/code/mcp/simplescraper-mcp-server.js",
        "--stdio"
      ],
      "env": {
        "SIMPLESCRAPER_API_KEY": "your-api-key-here"
      }
    }
  }
}
Features :
- Update Process: When server code changes, users must manually download and install updates
- Configuration Requirements: Users edit configuration files and manage dependencies
- Updates: Difficult to roll out updates to your server across a user base.
- Desktop-Bound: Primarily limited to desktop applications that can launch local processes.
- Credential Management: API keys or other credentials stored in local configuration files or environment variables on the user's machine
- Direct Resource Access: Good for tools that need direct access to local files or system resources (e.g., a server that reads from
/Users/username/Documents).
Bridged Remote Servers: An Interim Approach
As MCP implementations evolve, a transitional pattern has emerged: remote servers with a local bridge connector. This approach exists because most MCP clients currently only support local servers via stdio transport, and don't yet support remote servers with OAuth authentication.
How it works:
- Server runs on the internet, with users running a local bridge tool (like
mcp-remote) - The bridge forwards requests from the local AI application to the remote server
- Still involves the
claude_desktop_config.jsonfile, but the command points to the bridge tool.
// claude_desktop_config.json using mcp-remote to bridge to a remote server
{
  "mcpServers": {
    "simplescraper-remote": {
      "command": "npx",
      "args": [
        "-y",
        "mcp-remote",
        "https://mcp.simplescraper.io/mcp",
        "--header",
        "Authorization:${AUTH_HEADER}",
        "--transport",
        "http-only"
      ],
      "env": {
        "AUTH_HEADER": "Bearer your-token-here"
      }
    }
  }
}
Features:
- Update Process: Server logic can be updated centrally, but bridge tool needs local updates
- Configuration Requirements: Still requires local configuration files
- Credential Storage: Authentication tokens typically stored in local configuration
- Use Cases: Good for transitioning from local to remote while supporting existing clients
Remote Servers: Scalable, secure (and the focus of this guide)
The most recent evolution in the MCP specification supports fully remote MCP servers that function like standard web services.
How it works:
- MCP server runs as a web service accessible via HTTPS
- AI clients connect directly without local configuration or proxies
- Authentication happens through standard OAuth 2.1 web flows
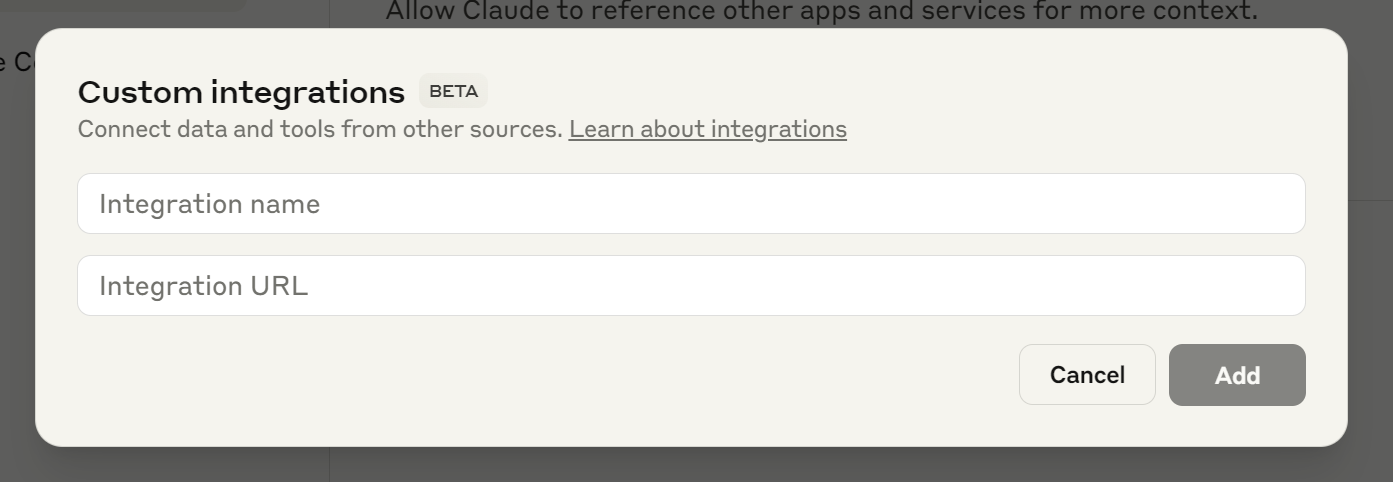
Image showing Claude's Integration UI
Features:
- Update Process: Changes immediately available to all users
- Configuration Requirements: No local setup or configuration files needed - configuration through LLM application settings UI rather than JSON files
- Portability: Works on any device that can access the web
- Credential Storage: Credentials managed through OAuth tokens, not local files
- Discovery: Central directories of available MCP servers
- Use Cases: Well-suited for SaaS products and broader integrations
While local and bridged setups have their place, building a remote MCP server offers the most robust, scalable, and user-friendly approach for integrating services with the broader AI ecosystem - these are the servers AI agents will interact with.
Trusting Remote Servers
You should only connect to official MCP servers hosted by the companies themselves. For example, if you want to access your Stripe data via an LLM application, use https://mcp.stripe.com/. Avoid third-party proxies or aggregators unless you trust them 100% as they will have access to your data.
Transport Protocols: Streamable HTTP vs. HTTP+SSE
The MCP specification defines multiple transport mechanisms that have evolved over time:
Transport Protocols Comparison Table
| Feature | Streamable HTTP (Modern) | HTTP+SSE (Legacy) |
|---|---|---|
| Protocol Version | 2025-03-26 | 2024-11-05 |
| SDK Transport Class | StreamableHTTPServerTransport | SSEServerTransport |
| Endpoints | Single /mcp for all operations | Dual endpoints: GET /mcp + POST /messages |
| Client-to-Server | POST /mcp | POST /messages?sessionId=xxx |
| Server-to-Client | Same POST response (streamed) | GET /mcp (SSE stream) |
| Session Identification | Via Mcp-Session-Id header | Via query parameters in URL |
| Session Termination | DELETE /mcp | Connection close |
| Implementation Complexity | Lower | Higher |
| Connection Management | Connection terminates naturally | Requires explicit management |
| Primary Benefit | Simpler, single connection | Compatible with older clients |
Most modern clients now use Streamable HTTP, but some older clients still rely on HTTP+SSE. A production-ready MCP server should support both transport types to remain compatible with all clients.
Part 2: Session management in your MCP Server
What Is Session Management and Why Do You Need It?
In MCP, "session management" simply means keeping track of a conversation between your LLM application, like Claude, and your server across multiple requests. Without sessions, the app would need to start from scratch with every request, making tools that require state (like a shopping cart or building a report through several data-gathering steps) impossible.
When the app first connects to your MCP server, it makes an "initialize" request. Your server needs to:
- Create a unique session ID
- Set up a transport instance for this conversation
- Remember this session for future requests
A "transport" is just MCP's term for the communication handler between your server and the LLM app. Think of it as a phone line - each session gets its own dedicated line so messages don't get mixed up. The transport handles the actual sending and receiving of MCP messages for that specific conversation.
How Sessions Are Passed Back and Forth
The MCP specification defines a specific way to handle session IDs:
- When the app first connects (initialization), your server generates a session ID
- Your server returns this ID in the
Mcp-Session-IdHTTP header - The app must include this same header in all subsequent requests
- If the session expires, your server returns a 404, and the app starts over
Implementing Session Management (The Simple Version)
The simplest and most effective approach for most implementations is to use an in-memory JavaScript Map or object to store your sessions:
const transports = {}; // JavaScript object stores transport instances by session IDThat's it! This object will store all active transport instances, with session IDs as keys.
Code Example: Simple Session Management
Here's a practical example from our MCP server implementation:
import { McpServer } from '@modelcontextprotocol/sdk/server/mcp.js';
import { StreamableHTTPServerTransport } from '@modelcontextprotocol/sdk/server/streamableHttp.js';
import { randomUUID } from 'node:crypto';

// store active sessions by ID
const transports = {};

app.post('/mcp', async (req, res) => {
  const isInitRequest = req.body?.method === 'initialize';

  if (isInitRequest) {
    // new session: build a server + transport pair
    const server = new McpServer({ name: 'My MCP Server', version: '1.0.0' });
    registerTools(server);

    const transport = new StreamableHTTPServerTransport({
      sessionIdGenerator: () => randomUUID(),
      onsessioninitialized: (id) => {
        transports[id] = { server, transport };
      }
    });

    await server.connect(transport);
    await transport.handleRequest(req, res, req.body);
    return;
  }

  // existing session: look it up and dispatch
  const sessionId = req.headers['mcp-session-id'];
  const entry = transports[sessionId];

  if (!entry) {
    return res.status(404).json({ error: 'Session not found' });
  }

  await entry.transport.handleRequest(req, res, req.body);
});

// cleanup when sessions end
app.delete('/mcp', async (req, res) => {
  const sessionId = req.headers['mcp-session-id'];

  if (transports[sessionId]) {
    delete transports[sessionId];
    res.status(204).end();
  } else {
    res.status(404).json({ error: 'Session not found' });
  }
});
That's really all there is to it for most implementations. The MCP SDK handles the complex parts of maintaining conversation state within the transport instance - you just need to make sure you keep track of which transport belongs to which session.
INFO
For production servers, you might want to add a simple timeout mechanism to clean up abandoned sessions, but the basic in-memory approach works well for most use cases.
When to Consider More Complex Options
For most implementations, the simple in-memory approach works. You might consider more complex options like Redis or database storage if:
- You're running multiple server instances behind a load balancer
- Your server needs to survive restarts without losing session state
- You have very high traffic volumes (thousands of concurrent sessions)
With session management in place to maintain conversation state, next we'll take a look at authentication, which ensures only authorized users can access your MCP tools.
Part 3: Securing Access with Authentication and OAuth
With session management in place to track conversation state, the next step is securing access to your MCP tools. This involves two related but distinct processes:
User Authentication: Verifying who your actual human user is (via Firebase, Clerk, etc.)
AI Client Authorization: Granting an LLM application permission to access your APIs on behalf of that authenticated user (via OAuth 2.1)
Don't let "OAuth 2.1" intimidate you - it's simply a standardized way for AI clients to request access to your tools, and does not require external service or libraries (although many good ones exist to make things easier). In practice, you'll implement a few simple endpoints in your Express server:
// express endpoints you'll build to be OAuth 2.1 compliant
app.get('/.well-known/oauth-protected-resource', (req, res) => {...})
app.get('/.well-known/oauth-authorization-server', (req, res) => {...})
app.get('/authorize', (req, res) => {...})
app.get('/callback', (req, res) => {...})
app.post('/token', (req, res) => {...})
If you have an existing app with users, you may use an auth system like Firebase or Clerk which already handles the hard parts (secure login, password management), meaning you only need to focus on the endpoints that connect authenticated users to AI clients.
This dual security model ensures that:
- Only real users with accounts can access your services
- AI clients can only take actions the user has specifically authorized
- You maintain control over which tools are accessible
Understanding the Tokens and Codes
It's helpful to understand the different tokens and codes used in the MCP OAuth flow, as this is a common source of confusion:
| Token/Code Name | What It Is | Comes From | Lifespan | Storage | Purpose |
|---|---|---|---|---|---|
| Identity Token | Signed token proving user identity | Firebase/Auth provider (after user login) | ~1 hour | Not stored - used immediately | Verify user is who they claim to be |
| Authorization Code | Temporary exchange code | Your MCP server creates it | ~10 minutes | Stored temporarily in database | LLM application exchanges this for access token |
| Access Token | Long-lived API access credential | Your MCP server creates it | Days/weeks | Stored permanently in database | LLM application sends this with every API request |
| Bearer Token | Same as Access Token | Same as Access Token | Same as Access Token | Same as Access Token | The way to send access token in headers |
Understanding the Complete OAuth Flow in MCP
When a user first asks an LLM application to use your MCP server, here's what happens:
- Initial Tool Request: The LLM application attempts to access your server
- Authentication Challenge: Your server responds with "401 Unauthorized"
- OAuth Discovery: The LLM application obtains authorization server information from /.well-known endpoints
- User Login Redirect: The LLM application directs the user to your login page
- Authentication: User logs in with your auth provider (Firebase, Auth0, etc.) and receives an identity token
- Authorization Code Grant: Your server creates a temporary authorization code
- Token Exchange: The LLM application exchanges this authorization code for an access token
- Authorized Tool Access: The LLM application can now make authorized requests to your tools with this token
This flow combines standard user authentication with the OAuth 2.1 protocol that governs how AI clients get authorized access. Here's how that looks visualized:
And here are the specific endpoints required to be implemented for this flow :
| Step # | Name | Endpoint | Purpose |
|---|---|---|---|
| 1 | Initial Request | Your remote mcp server (eg https://mcp.simplescraper.io/mcp) | Client attempts to use a tool |
| 2 | Protected Resource Discovery | /.well-known/oauth-protected-resource | Discovers auth server details |
| 3 | Authorization Server Discovery | /.well-known/oauth-authorization-server | Provides detailed auth server metadata |
| 4 | Authentication | /authorize | Shows login UI to the user |
| 5 | Authorization Code | /callback | Receives result after user login |
| 6 | Token Exchange | /token | Exchanges code for token |
| 7 | Authenticated Access | /mcp with Authorization header | Uses token for all tool calls |
We'll implement all of these endpoints below, including PKCE (a security feature that prevents certain types of attacks).
Implementing OAuth 2.1 endpoints
// mcp-server.js
// protected Resource Metadata endpoint
app.get('/.well-known/oauth-protected-resource', (req, res) => {
  const baseUrl = getBaseUrl(req);

  const metadata = {
    authorization_servers: [
      {
        issuer: baseUrl,
        authorization_endpoint: `${baseUrl}/authorize`,
      }
    ]
  };

  res.json(metadata);
});

// authorization Server Metadata endpoint
app.get('/.well-known/oauth-authorization-server', (req, res) => {
  const baseUrl = getBaseUrl(req);

  res.json({
    issuer: baseUrl,
    authorization_endpoint: `${baseUrl}/authorize`,
    token_endpoint: `${baseUrl}/token`,
    registration_endpoint: `${baseUrl}/register`,
    token_endpoint_auth_methods_supported: ["none"],
    scopes_supported: ["scrape"],
    response_types_supported: ["code"],
    response_modes_supported: ["query"],
    grant_types_supported: ["authorization_code"],
    code_challenge_methods_supported: ["S256"]
  });
});
These endpoints provide information about our authentication flow to MCP clients.
User Authentication Options for Your MCP Server
You have several options for implementing user authentication:
Your Existing Auth System
- If your application already has authentication, use it!
- You'll just need to add the OAuth endpoints required by MCP
- Avoids introducing another auth system
- Works with any authentication system that can issue tokens
Firebase Auth (What we'll use in this guide)
- Easy to set up with minimal code
- Free for most use cases
- Handles login UI and user management
- Integrates with broader Google Cloud services
Supabase Auth
- Open source and hosted options
- Directly integrates with PostgreSQL database
- The right choice if you're already using Supabase
Clerk
- Developer-friendly with beautiful UI components
- Pre-built React components make integration easy
- Popular option with good user management features
Auth0
- More comprehensive with advanced features
- Handles both authentication and authorization rules
- Great compliance features for regulated industries
- You still need all the same MCP OAuth endpoints even with Auth0
Creating the User Login Experience
While auth providers like Firebase have their own login UI, you may want a custom login page to match your application's branding. You'll create an /authorize endpoint that serves an HTML page for user login (e.g., Google or email sign-in) and then redirects to the /callback endpoint with OAuth parameters.
The /authorize Endpoint
// mcp-server.js
app.get('/authorize', (req, res) => {
  res.sendFile(path.join(__dirname, 'public', 'authorize.html'));
});
Frontend Login Logic
Your login page needs to:
- Authenticate the user with your auth provider (Firebase, Auth0, etc.)
- Get an identity token proving who they are
- Redirect to
/callbackwith all the OAuth parameters
// in your authorize.html file
function sendToken() {
  firebase.auth().currentUser.getIdToken()
    .then(idToken => {
      const urlParams = new URLSearchParams(window.location.search);
      const callbackUrl = new URL('/callback', window.location.origin);

      // add the identity token from Firebase
      callbackUrl.searchParams.set('idToken', idToken);

      // forward OAuth parameters from the original request
      ['code_challenge', 'code_challenge_method', 'state', 'redirect_uri', 'client_id']
        .forEach(param => {
          if (urlParams.get(param)) {
            callbackUrl.searchParams.set(param, urlParams.get(param));
          }
        });
      callbackUrl.searchParams.set('response_type', 'code');

      // redirect to callback with all parameters
      window.location.href = callbackUrl.toString();
    })
    .catch(err => {
      console.error('Login failed:', err);
      document.getElementById('statusMessage').innerText = `❌ Login failed: ${err.message}`;
    });
}
This handles the user login process and redirects to /callback with both the identity token and OAuth parameters required for the next step.
INFO
Other auth providers like Auth0, Clerk, or Supabase would replace firebase.auth().currentUser.getIdToken() with their own token retrieval methods, but the overall pattern remains the same.
Implementing Access Token Verification
With the user login flow in place, we now need to handle the access tokens that the LLM application sends in the request Authorization Bearer header with each request. This verification process ensures that only valid tokens from authenticated users can access our tools.
We can create a helper function that validates these tokens and provides user context to our tool handlers:
// mcp-server.js
// authentication helper function
async function authenticateToken(req, res, rpcId = null) {
  const authHeader = req.headers['authorization'] || '';
  const token = authHeader.replace(/^Bearer\s+/i, '').trim();
  const baseUrl = getBaseUrl(req);

  if (!token) {
    const wwwAuthHeader = `Bearer realm="MCP Server", resource_metadata_uri="${baseUrl}/.well-known/oauth-protected-resource"`;

    return {
      success: false,
      response: res.status(401)
        .header('WWW-Authenticate', wwwAuthHeader)
        .json({
          jsonrpc: '2.0',
          error: { code: -32000, message: 'Missing Bearer token' },
          id: rpcId
        })
    };
  }

  try {
    // verify token in Firestore
    const doc = await db.collection('mcp-tokens').doc(token).get();
    if (!doc.exists) {
      return {
        success: false,
        response: res.status(403).json({
          jsonrpc: '2.0',
          error: { code: -32001, message: 'Invalid or expired token' },
          id: rpcId
        })
      };
    }

    const tokenData = doc.data();

    // create auth object for MCP server
    const authObject = {
      token: token,
      clientId: String(tokenData.client_id),
      scopes: Array.isArray(tokenData.scopes) ? tokenData.scopes.map(String) : []
    };

    return {
      success: true,
      tokenData,
      authObject
    };
  } catch (dbError) {
    return {
      success: false,
      response: res.status(500).json({
        jsonrpc: '2.0',
        error: { code: -32002, message: 'Database error during authentication' },
        id: rpcId
      })
    };
  }
}
The returned authObject contains everything our tool handlers need to know about who's making the request and what they're allowed to do.
Part 4: Building the Core MCP Server & Transport Handlers
Core Server Setup with Express
Let's start by setting up the basic structure of our MCP server using Express. This forms the foundation for our implementation:
// mcp-server.js
import express from 'express';
import { McpServer } from '@modelcontextprotocol/sdk/server/mcp.js';
import { StreamableHTTPServerTransport } from '@modelcontextprotocol/sdk/server/streamableHttp.js';
import { SSEServerTransport } from '@modelcontextprotocol/sdk/server/sse.js';
import { v4 as uuidv4 } from 'uuid';
import authRoutes from './auth-routes.js';
import { debugLog } from './utils.js';
import { db } from './firebaseConfig.js';

// create Express app
const app = express();
const port = process.env.PORT || 3000;

// configure middleware
app.use(express.json());
app.use(express.urlencoded({ extended: true }));

// add CORS middleware
app.use((req, res, next) => {
  res.header('Access-Control-Allow-Origin', '*');
  res.header('Access-Control-Allow-Methods', 'GET, POST, OPTIONS, DELETE');
  res.header('Access-Control-Allow-Headers', 'Content-Type, Authorization, Mcp-Session-Id');
  res.header('Access-Control-Expose-Headers', 'Mcp-Session-Id, WWW-Authenticate');

  if (req.method === 'OPTIONS') {
    return res.status(200).end();
  }

  next();
});

// mount authentication routes
app.use(authRoutes);

// returns a fresh McpServer with tools registered, one per session
function createMcpServer() {
  const server = new McpServer({
    name: "My MCP Server",
    version: "1.0.0",
    instructions: `Instructions for using these tools...`
  });

  registerTools(server);

  return server;
}

// transports[sessionId] = { server, transport }
const transports = {};

// start server
app.listen(port, () => {
  console.log(`MCP server running on port ${port}`);
  console.log(`MCP endpoint available at http://localhost:${port}/mcp`);
});
Next, we'll implement the transport handling.
Transport Implementation Details
Each new session gets its own McpServer paired with its own StreamableHTTPServerTransport. The SDK transport handles session ID generation, the Mcp-Session-Id response header, and content negotiation between JSON and SSE.
// mcp-server.js
import { randomUUID } from 'node:crypto';

// creates a new session: fresh McpServer, fresh transport, stored in the map
async function startSession() {
  const server = createMcpServer();

  const transport = new StreamableHTTPServerTransport({
    sessionIdGenerator: () => randomUUID(),
    onsessioninitialized: (id) => {
      transports[id] = { server, transport };
    }
  });

  transport.onclose = () => {
    if (transport.sessionId) delete transports[transport.sessionId];
  };

  await server.connect(transport);
  return transport;
}
Session Management Implementation
Finally, let's implement the main MCP endpoint. The flow is simple: initialize requests start a new session, everything else looks up the session and lets the SDK transport handle the rest.
// mcp-server.js
// POST handler for /mcp endpoint
app.post('/mcp', async (req, res) => {
  const body = req.body;
  const rpcId = body?.id ?? null;

  const authResult = await authenticateToken(req, res, rpcId);
  if (!authResult.success) return authResult.response;
  req.auth = authResult.authObject;

  const sessionId = req.headers['mcp-session-id'];
  const isInitRequest = body?.method === 'initialize';

  try {
    if (isInitRequest) {
      // new session: SDK transport generates the ID and sets the response header
      const transport = await startSession();
      await transport.handleRequest(req, res, body);
      return;
    }

    if (!sessionId || !transports[sessionId]) {
      return res.status(sessionId ? 404 : 400).json({
        jsonrpc: '2.0',
        error: { code: sessionId ? -32004 : -32003, message: sessionId ? 'Session not found' : 'No session ID provided' },
        id: rpcId
      });
    }

    await transports[sessionId].transport.handleRequest(req, res, body);
  } catch (err) {
    if (!res.headersSent) {
      res.status(500).json({
        jsonrpc: '2.0',
        error: { code: -32603, message: 'Internal server error during MCP request handling' },
        id: rpcId
      });
    }
  }
});
Initialize creates a new session and subsequent requests reuse it via the Mcp-Session-Id header. The SDK transport handles content negotiation and session-header echo automatically.
Supporting Both Modern and Legacy Clients
A key challenge in building a production-ready MCP server is supporting both modern clients (using Streamable HTTP) and legacy clients (using HTTP+SSE). Rather than creating separate implementations, we'll use a unified approach:
- Per-Session MCP Server: Each session gets its own McpServer, built from a shared factory that registers the same tools
- Multiple Transport Types: Support different transport implementations for different clients
- Protocol Detection: Route requests to the appropriate transport handler based on HTTP method and path
- Shared Authentication: Apply the same authentication logic regardless of transport type
This approach provides maximum compatibility while minimizing code duplication and maintenance overhead.
                     Client Request
                          │
                          ▼
            ┌─────────────────────────┐
            │      Request Router     │
            └─────────────┬───────────┘
                          │
                ┌─────────┴──────────┐
                │                    │
                ▼                    ▼
┌─────────────────────────┐ ┌─────────────────────────┐
│   Modern Transport      │ │   Legacy Transport      │
│  (StreamableHTTP)       │ │  (HTTP+SSE)             │
└─────────────┬───────────┘ └─────────────┬───────────┘
              │                           │
              ▼                           ▼
┌─────────────────────────────────────────────────────┐
│                    MCP Server                       │
└─────────────────────────────────────────────────────┘
                          │
                          ▼
               ┌─────────────────────┐
               │   Tools Registry    │
               └─────────────────────┘
Modern Clients (Streamable HTTP)
Modern clients use the Streamable HTTP transport with these key characteristics:
- Single
/mcpEndpoint: All requests go through one endpoint - Session ID via Header: The
Mcp-Session-Idheader tracks session state - JSON or SSE Responses: The same endpoint can return either format based on the client's needs
- DELETE for Cleanup: Clients can explicitly terminate sessions
┌────────────────┐
│Client POST /mcp│
└───────┬────────┘
        │
        ▼
┌────────────────┐
│   Validate     │
│  Bearer Token  │
└───────┬────────┘
        │
        ▼
┌────────────────┐
│Extract/Generate│
│   Session ID   │
└───────┬────────┘
        │
        ▼
┌────────────────┐
│ Get/Create     │
│   Transport    │
└───────┬────────┘
        │
        ▼
┌────────────────┐
│transport.handle│
│    Request     │
└───────┬────────┘
        │
        ▼
┌────────────────┐
│   Response     │
│  (streamed)    │
└────────────────┘
Modern Client Implementation
// POST handler for /mcp (modern Streamable HTTP clients)
app.post('/mcp', async (req, res) => {
  const body = req.body;
  const rpcId = body?.id ?? null;

  const authResult = await authenticateToken(req, res, rpcId);
  if (!authResult.success) return authResult.response;
  req.auth = authResult.authObject;

  const sessionId = req.headers['mcp-session-id'];
  const isInitRequest = body?.method === 'initialize';

  try {
    if (isInitRequest) {
      const transport = await startSession();
      await transport.handleRequest(req, res, body);
      return;
    }

    if (!sessionId || !transports[sessionId]) {
      return res.status(sessionId ? 404 : 400).json({
        jsonrpc: '2.0',
        error: { code: sessionId ? -32004 : -32003, message: sessionId ? 'Session not found' : 'No session ID provided' },
        id: rpcId
      });
    }

    await transports[sessionId].transport.handleRequest(req, res, body);
  } catch (err) {
    if (!res.headersSent) {
      res.status(500).json({
        jsonrpc: '2.0',
        error: { code: -32603, message: 'Internal server error during MCP request handling' },
        id: rpcId
      });
    }
  }
});
Legacy Clients (HTTP+SSE)
Legacy clients use the HTTP+SSE transport, which requires a different approach with two separate endpoints:
- Dual Endpoints:
GET /mcpfor SSE stream andPOST /messagesfor requests - Session ID in URL: Query parameters used for session tracking
- Connection Management: Long-lived SSE connections must be properly maintained
┌────────────────┐      ┌────────────────┐
│ Client GET /mcp│      │Client POST     │
│  (SSE stream)  │      │/messages?id=xxx│
└───────┬────────┘      └───────┬────────┘
        │                       │
        ▼                       ▼
┌────────────────┐      ┌────────────────┐
│   Validate     │      │   Validate     │
│  Bearer Token  │      │  Bearer Token  │
└───────┬────────┘      └───────┬────────┘
        │                       │
        ▼                       ▼
┌────────────────┐      ┌────────────────┐
│Create SSEServer│      │ Extract Session│
│   Transport    │      │ID from URL Param│
└───────┬────────┘      └───────┬────────┘
        │                       │
        ▼                       ▼
┌────────────────┐      ┌────────────────┐
│ server.connect  │     │ Lookup Transport│
│  (transport)    │     │ By Session ID  │
└───────┬────────┘      └───────┬────────┘
        │                       │
        │                       ▼
        │              ┌────────────────┐
        │              │transport.handle│
        │              │  PostMessage   │
        │              └───────┬────────┘
        │                      │
        ▼                      ▼
┌────────────────┐     ┌────────────────┐
│ Keep-Alive SSE │     │JSON Response to│
│Connection (resp)│     │  POST Request  │
└────────────────┘     └────────────────┘
Legacy Client Implementation
// GET handler for /mcp (legacy SSE stream)
app.get('/mcp', async (req, res) => {
  const authResult = await authenticateToken(req, res, null);
  if (!authResult.success) return authResult.response;
  req.auth = authResult.authObject;

  const server = createMcpServer();
  const transport = new SSEServerTransport('/messages', res);
  transports[transport.sessionId] = { server, transport };

  res.setHeader('Content-Type', 'text/event-stream');
  res.setHeader('Cache-Control', 'no-cache');
  res.setHeader('Connection', 'keep-alive');
  res.setHeader('X-Accel-Buffering', 'no');
  res.setHeader('Mcp-Session-Id', transport.sessionId);

  try {
    await server.connect(transport, { auth: req.auth });
  } catch (error) {
    if (!res.headersSent) res.status(500).send('Internal server error during SSE setup.');
    else res.end();
    delete transports[transport.sessionId];
  }
});

// POST /messages handler for legacy clients
app.post('/messages', express.json(), async (req, res) => {
  const sessionId = req.query.sessionId;
  const body = req.body;
  const rpcId = (body && body.id !== undefined) ? body.id : null;

  // authenticate the token
  const authResult = await authenticateToken(req, res, rpcId);
  if (!authResult.success) {
    return authResult.response;
  }

  req.auth = authResult.authObject;

  if (!sessionId) {
    return res.status(400).json({
      jsonrpc: '2.0',
      error: { code: -32000, message: 'Missing sessionId in query parameters' },
      id: rpcId
    });
  }

  const entry = transports[sessionId];

  if (!entry || !(entry.transport instanceof SSEServerTransport)) {
    return res.status(404).json({
      jsonrpc: '2.0',
      error: { code: -32001, message: 'Session not found or not an SSE session' },
      id: rpcId
    });
  }

  try {
    await entry.transport.handlePostMessage(req, res, body);
  } catch (error) {
    if (!res.headersSent) {
      res.status(500).json({
        jsonrpc: '2.0',
        error: { code: -32603, message: 'Internal server error handling message' },
        id: rpcId
      });
    }
  }
});
Managing Session State Across Transport Types
One challenge with supporting multiple transport types is ensuring consistent session management. Our approach uses a single transports map to store all transport instances, regardless of type.
This allows us to:
- Track All Sessions: Maintain a consistent view of active sessions
- Reuse Authentication Logic: Apply the same authentication regardless of transport type
- Clean Up Resources: Properly terminate sessions when they're no longer needed
The key is to make sure that each transport's sessionId is unique, even across different transport types.
Error Handling and Graceful Fallbacks
Proper error handling is crucial for a reliable MCP server. Our implementation includes several error-handling strategies:
- JSON-RPC Error Responses: Return structured error objects that follow the JSON-RPC 2.0 specification
- Transport-Specific Error Handling: Different handling for HTTP responses vs. SSE streams
- Authentication Errors: Specific error codes for missing, invalid, or expired tokens
- Session Errors: Clear error messages for session-related issues
- Transport Errors: Graceful handling of transport-level exceptions
Common MCP Error Codes
| Code | Description | Common Cause | How to Handle |
|---|---|---|---|
| -32000 | Authentication Error | Missing or invalid token | Return WWW-Authenticate header |
| -32001 | Invalid Session | Session ID not found | Client should reinitialize |
| -32002 | Method Not Found | Client called unknown method | Check method name |
| -32003 | Invalid Parameters | Missing or invalid parameters | Validate parameters |
| -32004 | Internal Error | Server-side exception | Log details for debugging |
| -32005 | Parse Error | Invalid JSON | Validate request format |
Implementing these error-handling strategies ensure that clients receive meaningful feedback when issues occur.
Part 5: Deployment and Production Considerations
Once your MCP server is working locally, you'll need to deploy it to make it accessible to LLM applications like Claude. The choice of deployment platform depends on your transport implementation and scaling requirements.
Cloud Deployment Options
1. Google Cloud Run
- Serverless and scales automatically
- Simple docker deployment with
gcloud run deploy - Works well with Firebase Auth
gcloud run deploy mcp-server --source . --platform managed --region us-central1 --allow-unauthenticated2. Vercel
- Zero-configuration deployments
- Excellent for Node.js applications
- Built-in edge network for global performance
- Seamless GitHub integration
3. Railway
- Automatic deployments from GitHub
- Built-in database options
4. Digital Ocean App Platform
- Simple deployment from Git repositories
- Managed SSL certificates
- Good choice for small to medium applications
Azure App Service, AWS Elastiv Beanstalk, and Render are also alternatives. Basically, any platform that supports Node.js applications can host your MCP server with proper configuration.
INFO
⚠️ Legacy HTTP+SSE transport (2024-11-05 spec) requires persistent connections, preventing serverless platforms like Google Cloud Run from scaling to zero when idle. This reduces cost efficiency compared to Streamable HTTP transport (2025-03-26 spec). This limitation applies to most serverless providers.
Part 6: Troubleshooting and Lessons Learned
Authentication Challenges and Solutions
Authentication was one of the most challenging aspects of implementing our MCP server. A few key lessons:
OAuth Discovery Flow: Many clients failed silently without proper discovery endpoints. Always implement
/.well-known/oauth-protected-resourceand/.well-known/oauth-authorization-server.PKCE Support: The PKCE flow is required by the MCP spec. Our solution validates the
code_verifieragainst the storedcode_challenge:
if (tokenData.code_challenge) {
  if (!code_verifier) {
    return res.status(400).json({ error: 'code_verifier required for PKCE flow' });
  }

  let calculatedChallenge;
  if (tokenData.code_challenge_method === 'S256') {
    const hash = crypto.createHash('sha256').update(code_verifier).digest('base64url');
    calculatedChallenge = hash;
  } else {
    calculatedChallenge = code_verifier;
  }

  if (calculatedChallenge !== tokenData.code_challenge) {
    return res.status(401).json({ error: 'Invalid code_verifier' });
  }
}- WWW-Authenticate Header: When a token is missing, clients expect a proper
WWW-Authenticateheader to start the OAuth flow. Our implementation follows the standard format:
const wwwAuthHeader = `Bearer realm="MCP Server", resource_metadata_uri="${baseUrl}/.well-known/oauth-protected-resource"`;
res.header('WWW-Authenticate', wwwAuthHeader);- Client Registration: Some clients require dynamic client registration. Implement a
/registerendpoint to support these clients:
router.post('/register', express.json(), async (req, res) => {
  const { client_name, redirect_uris = [] } = req.body;
  const client_id = uuidv4();

  await db.collection('mcp-clients').doc(client_id).set({
    client_id,
    client_name,
    redirect_uris,
    createdAt: new Date().toISOString()
  });

  res.status(201).json({
    client_id,
    token_endpoint_auth_method: 'none',
    redirect_uris
  });
});
Debugging Transport-Specific Issues
Each transport type comes with its own set of challenges:
Streamable HTTP Issues:
- Session ID Propagation: Make sure to set the
Mcp-Session-Idheader in both directions:- Extract from
req.headers['mcp-session-id']for incoming requests (note that headers are lowercase in Node.js/Express). - Always set via
res.setHeader('Mcp-Session-Id', effectiveSessionId)in responses (with capitalized casing as required by the MCP spec)
- Extract from
- Content-Type Handling: Different clients expect different content types:
- The spec says clients MUST accept both
application/jsonandtext/event-stream - In practice, many clients only support one format
StreamableHTTPServerTransportauto-negotiates from the client'sAcceptheader (SSE is the default). Only setenableJsonResponse: trueif you specifically want JSON responses for every non-streaming request
- The spec says clients MUST accept both
HTTP+SSE Issues:
- SSE Connection Timeouts: SSE connections can timeout unexpectedly:
- Set
Content-Type: text/event-stream,Cache-Control: no-cache, andConnection: keep-aliveheaders - Consider implementing a heartbeat mechanism to keep connections alive
- Set
- Session Management Complexity: The dual-endpoint nature of HTTP+SSE makes session management more complex:
- Ensure that
POST /messagescan find the transport created byGET /mcp - Extract sessionId from query parameters:
POST /messages?sessionId=... - Clean up resources properly when SSE connections close
- Ensure that
- Headers Already Sent: A common error with SSE is trying to send headers after the stream has started:
- Check
res.headersSentbefore attempting to send status codes or headers - Handle errors differently for SSE vs. regular HTTP responses
- Check
Session Management Gotchas
A few things to watch for:
One McpServer per session: Don't share a single
McpServerinstance across multiple transports. The SDK pairsMcpServer1:1 with a transport, and outgoing responses route through whichever transport was most recently connected. Create a new server for each session.Let the SDK generate session IDs: Pass
sessionIdGenerator: () => randomUUID()and register your map entry inside theonsessioninitializedcallback. You don't need a separate "pending" map or manualtransport.sessionId = ...assignment.Session Cleanup: Proper session cleanup is needed to prevent memory leaks:
- Set an
onclosehandler on the transport that removes the entry from your map - Implement explicit cleanup in the DELETE
/mcphandler - Consider a session timeout for abandoned sessions
- Set an
Working Around MCP Spec Limitations
The MCP specification has several limitations that required workarounds:
- Authentication Context: The spec doesn't provide a standard way to pass authentication context to tool handlers:
- We used
req.authto pass authentication information through the request object - Future versions of the SDK may support a better approach
- We used
- Limited Error Handling: The spec doesn't fully define error handling:
- We implemented a consistent approach using JSON-RPC error codes
- Always include the original
idin error responses for proper correlation
- Missing But Required Endpoints: Some clients expect endpoints not clearly required by the spec:
- Include a
registration_endpointin OAuth metadata even if unused - This prevents silent failures during client initialization
- Include a
Testing Your Implementation
Once you've built your MCP server, you'll want to test it to ensure it works with different clients. One current (and temporary) hurdle is that for now accessing the Claude's remote MCP settings requires a Claude Max subscription. Fortunately, there are other approaches to test your implementation.
Using mcp-remote for Testing
The mcp-remote tool provides a convenient way to test your remote MCP server. This approach uses Claude Desktop (or any other LLM application supporting MCP) with a local bridge to your remote server.
Add the following configuration to your claude_desktop_config.json file:
{
  "mcpServers": {
    "test-remote-mcp": {
      "command": "npx",
      "args": [
        "-y",
        "mcp-remote",
        "https://your-server-url.com/mcp",
        "--header",
        "Authorization:${AUTH_HEADER}",
        "--transport",
        "http-only"
      ],
      "env": {
        "AUTH_HEADER": "Bearer your-token-here"
      }
    }
  }
}
Cloudflare's AI playground
Cloudflare provide an AI playground that allows you to enter the URL of your remote MCP server and initiate the authorization process. It comes with a debug log that is helpful for indentifying any issues that occur during the process.
Conclusion
Building a reliable MCP server today feels a little rough around the edges, mainly because of sparse documentation and a rapidly evolving specification. However, as this guide shows, once you have the steps in front of you, building a full functionality server is relatively simple.
With your server running, your app can seamlessly talk to LLMs and you can enjoy the benefits (and occasional frustrations) of being an early adopter to a protocol that may turn out to be as foundational to AI as HTTP became for the web.
Additional Resources
For those looking to learn more about MCP implementation, here are some helpful resources:
- Model Context Protocol Specification: The official specification
- MCP SDK Documentation: Documentation for the official JavaScript SDK
- OAuth 2.1 Specification: Details on implementing secure authentication
- Firebase Authentication Guide: Documentation for Firebase authentication
- Auth0 Documentation: For Auth0 implementation details
- Clerk Documentation: For Clerk authentication integration
- Supabase Auth Documentation: For Supabase authentication
- MCP Inspector: Developer tool for testing and debugging MCP servers
- Awesome Remote MCP Servers: List of spec compliant remote MCP servers (including Simplescraper's)